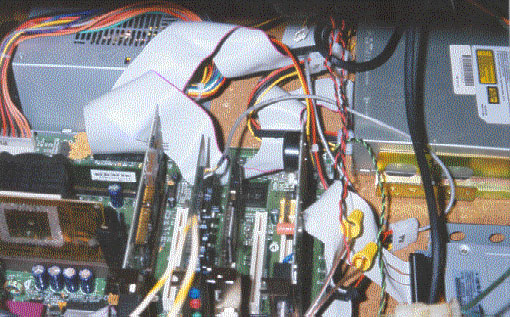
Here are photos of the MAME cabinet computer, both taken through the coin door in front. The first one is a wide shot. Note the Belkin cable on the right inside the door; that'll be discussed in the Control Panel section. 
I had a few parts sitting around from previous computer projects, but I needed some others. Then came Uncle Sam's tax-refund bounty and I decided to kill two birds with one stone. First stop was Sam's Club for a CTX 19-inch monitor for $300.
I upgraded my main computer with a new CPU, taking the old Celeron 400 and slot adapter/fan for the MAME game ($75 value). Then it was a visit to the great Milwaukee PC outlet store. I bought an AOPEN motherboard for a steal of $65; memory was $65 for 64 megs; I had an 8-gig hard drive handy ($100 value, tops); a floppy drive was $8; a CD-Rom drive was $24; an ATX power supply was $24; and since it was cheap I bought an ATI 8-meg AGP video card for $16, an Ensoniq PCI sound card for $24; a modem for $16 and even an $8 network card. I found a good trackball at Best Buy for $20 and decided to splurge on a Logitech radio wireless keyboard for $60. I had most of the cables and wires sitting around; others were cheap or free since I'm a regular at that outlet store. The whole computer was less than $500.
I didn't need a case; instead I just figured out how it would fit on a piece of 22.5-inch wide particle-board shelving. Everything fit on the top except the hard drive, which fit underneath. I put it all together, then screwed and glued two mounting boards inside the MAME cabinet.
Then I had to (sorry again, purists) cut two holes in the right side of the MAME cabinet for easy access to the CD-ROM drive and the floppy drive. This was my weakest effort of the project. I needed some extra space around the cuts so I could easily rotate the computer mounting board to pull it out for service. This wound up looking sloppy; a little black spray point helped a little.
I installed two swinging latches to hold the computer mount in place. The way it's constructed, all the AGP/PCI cards are facing the front of the cabinet, so I can for instance plug in a USB cable by opening the front of the cabinet.
I installed a couple of 2x2 strips on the inside floor of the cabinet to hold the boom box in place and plugged it and the computer into the power strip.
It booted the first time, a record for me.
Next stop, the control panel. |